Easy No-Sew Fish Extender Door Hanger For Your Disney Cruise
This post may contain affiliate links. Read the full disclosure
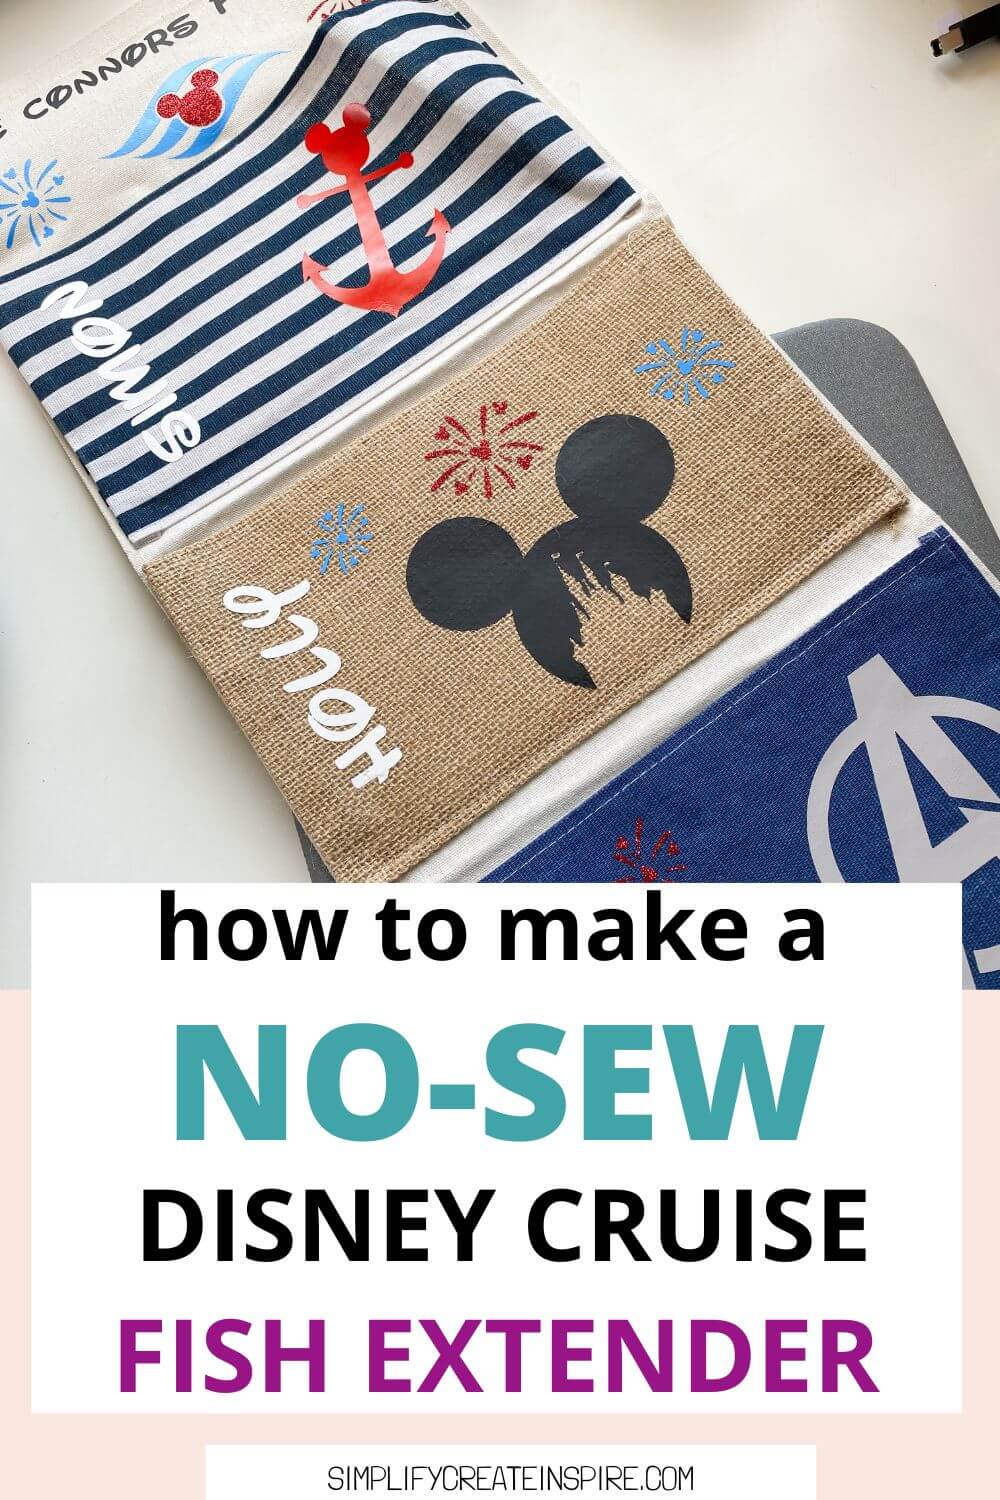
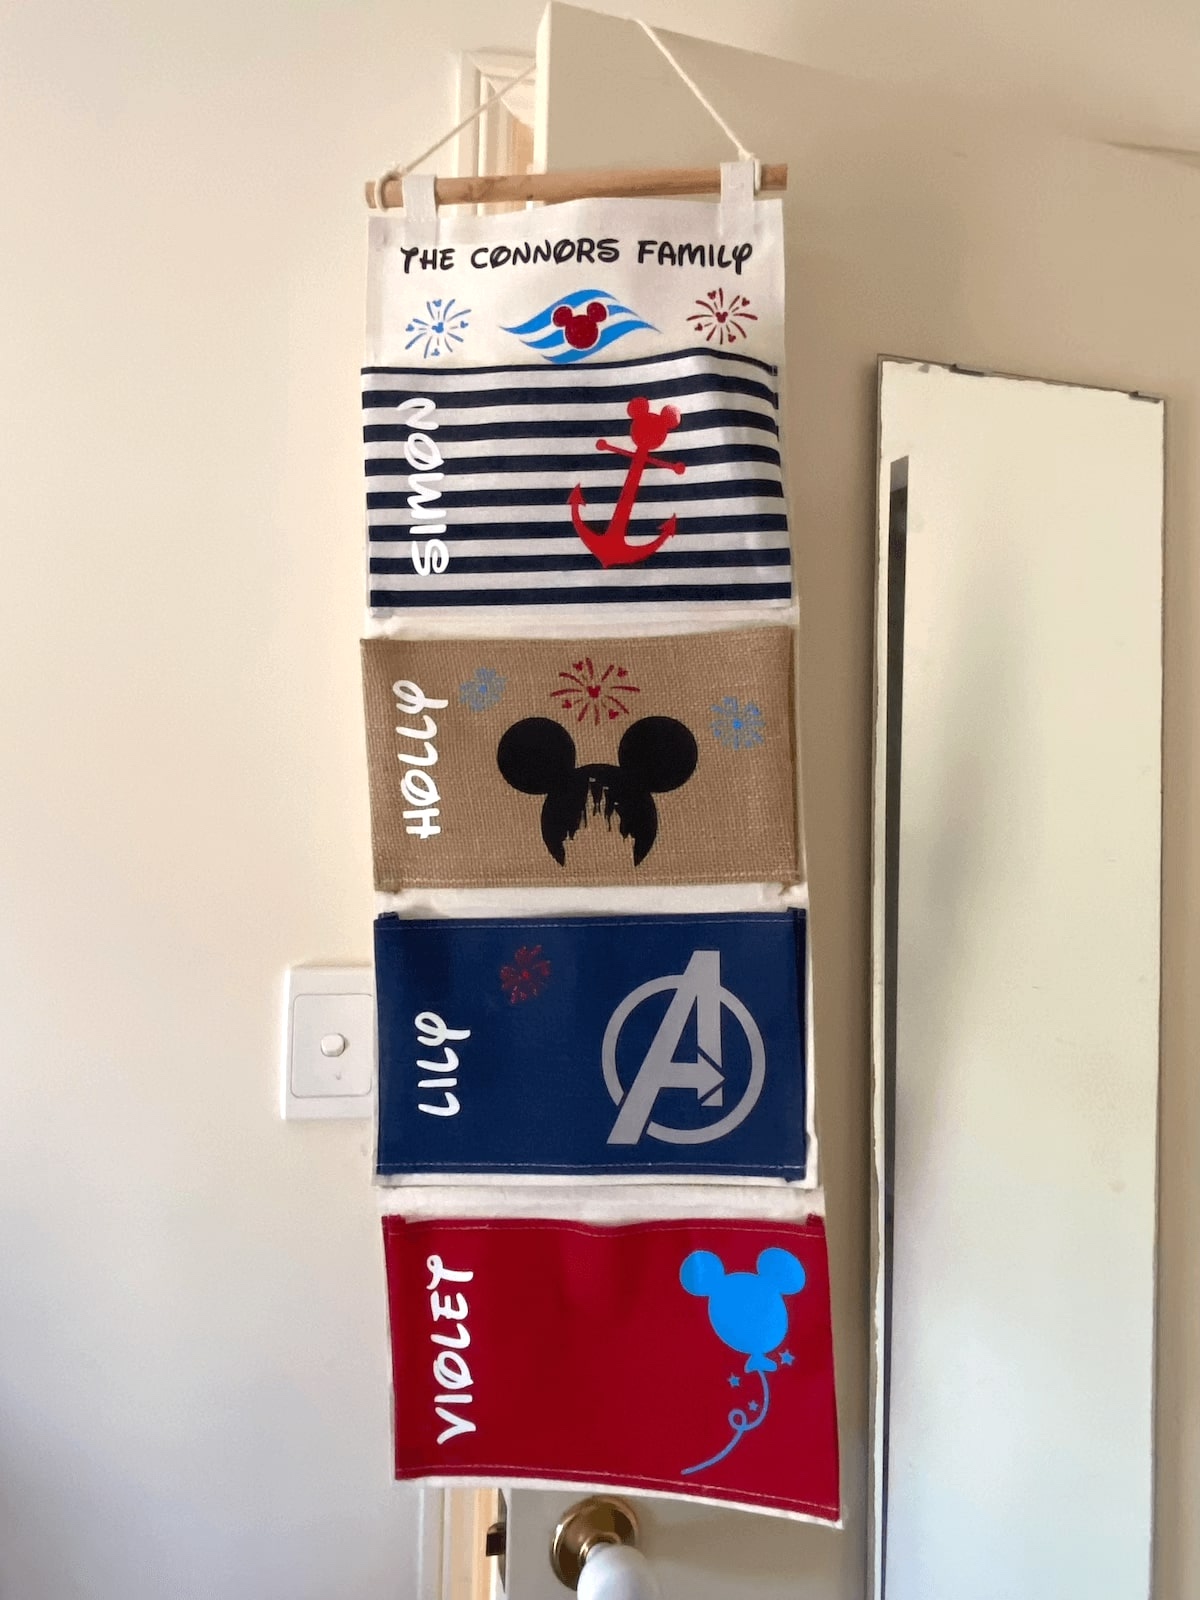
Heading on a Disney cruise soon? This DIY no-sew fish extender door hanger is so easy to make… and best of all, no sewing machine required! If you’re short on time or want a thrifty DIY fish extender hanger that’s still super cute, this is the tutorial for you!
DIY No-Sew Fish Extender For Your Disney Cruise
One of the most exciting traditions of cruising with Disney Cruise Line is the fish extender exchange. This optional gift exchange is something relatively unheard of outside of the DCL community, and if like us, you had no idea what a fish extender was before planning your first Disney Cruise, you wouldn’t be alone.
So just in case you are still brand new to all things fish extender, let’s cover the basics:
What Is A Disney Cruise Fish Extender?
The Disney cruise fish extender is an optional gift exchange that happens on each Disney cruise. This has nothing to do with Disney Cruise Lines themselves and is completely organised by cruise passengers.
There are Facebook groups organised for each cruise sailing date, so if you haven’t joined yours yet and you’re keen to get involved, search via Facebook and you should find one.
You then sign up and the organiser will pair you with other families. Usually, this involves filling out a spreadsheet with each of your family member’s names, interests and ages. From here, you make or buy gifts for each participating cabin. This can be individual gifts or a family cabin gift.
The number of cabins participating can differ, however, our experience has been with 10 cabins total, including us.
When you’re on the cruise, you hang your fish extender hanger on the fish hook next to your cabin door… this is where the name comes from. At some point during your cruise, you drop your gifts off in the hangers of the other participating cabins and they do the same for you. Fun!
How To Make A DIY No-Sew Fish Extender Door Hanger
There are so many options for making or purchasing fish extenders for your Disney cruise gifts. You can buy a simple hanging organiser and just keep it as is, no decorating required.
You can sew one. Or purchase a beautiful but expensive handmade fish extender from Etsy.
Or you can do what I did, and purchase pre-made door hangers and decorate them yourself.
What You Will Need
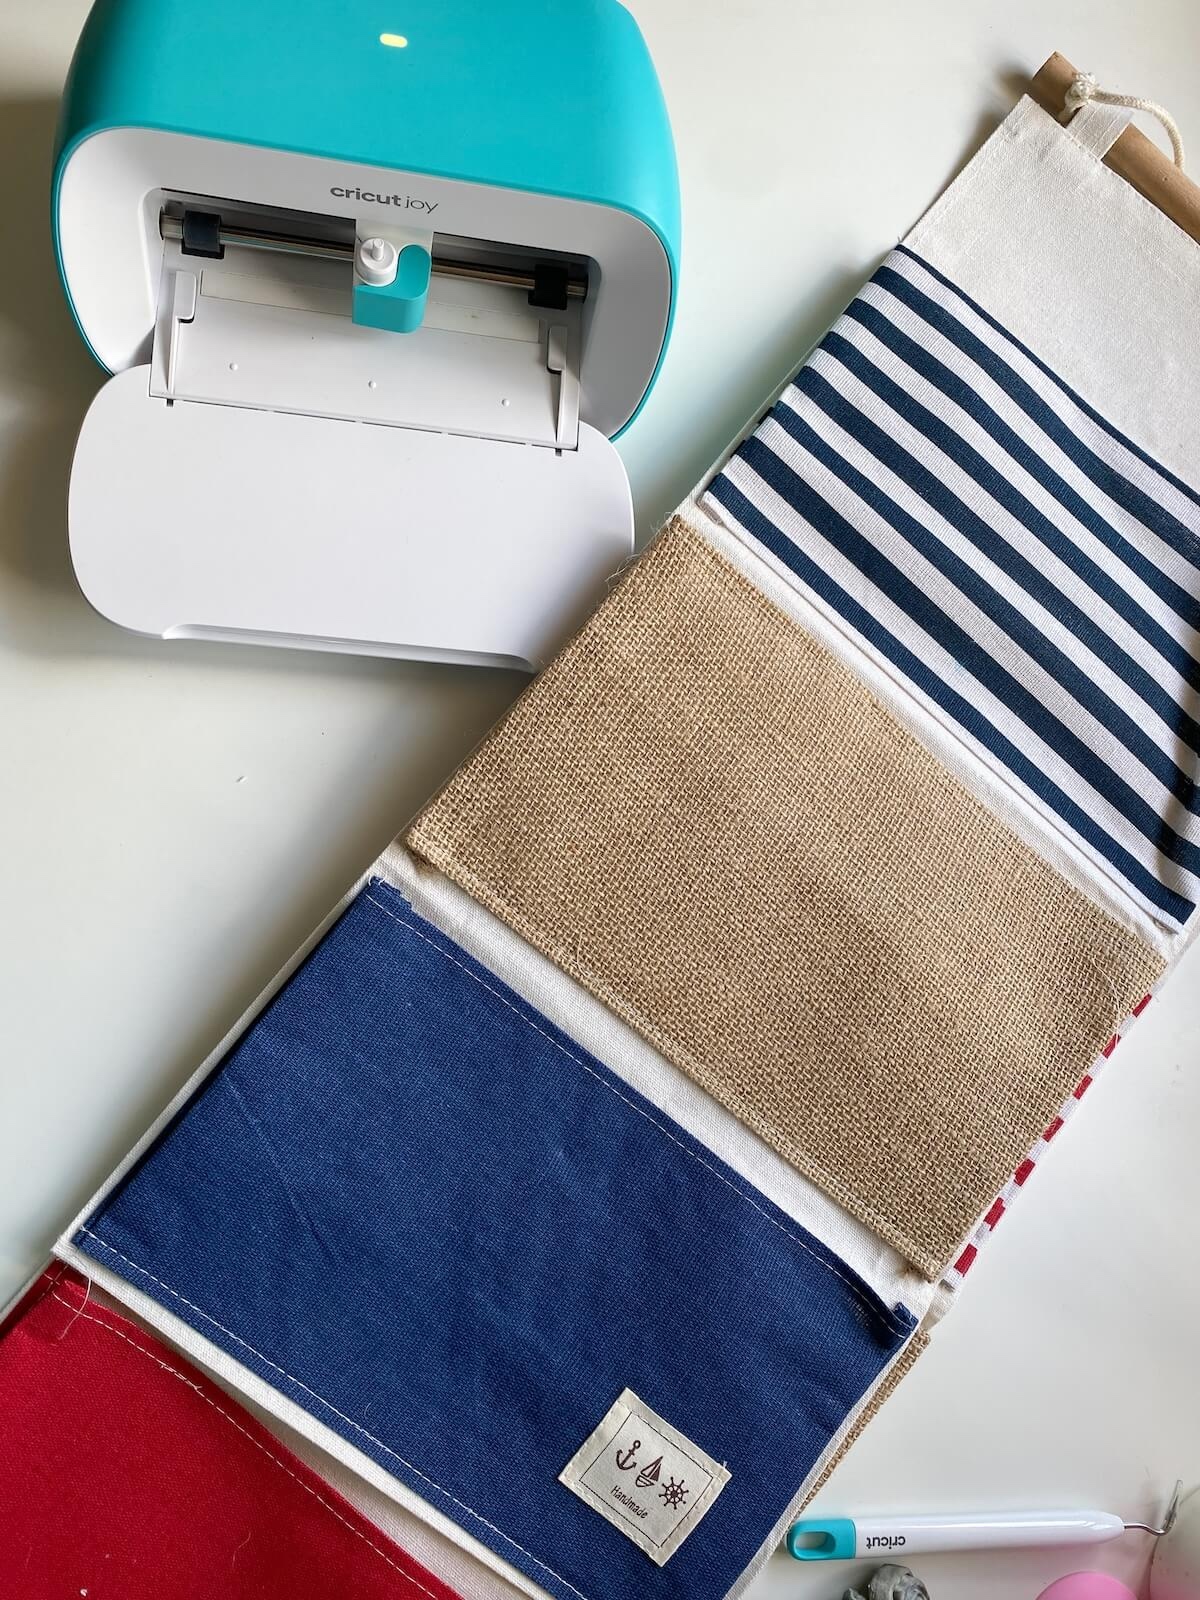
To make these no-sew DIY fish extenders, you will need the following:
- Hanging organisers – I got 2 of these ones from Amazon in different colours.
- Safety Pins
- Vinyl Cutting Machine & Heat Transfer Vinyl – I used my Cricut Joy to cut out vinyl decorations, however, you can also purchase iron-on transfers and patches instead
The hanging organisers on Amazon and other online stores mostly come with 3 baskets/sections. This is perfect if you’re a family of 3, however, we are a family of 4 so we needed 2. I will show you below how to attach the two organisers below – without a sewing machine.
Decorating Your Disney Fish Extender With Cricut
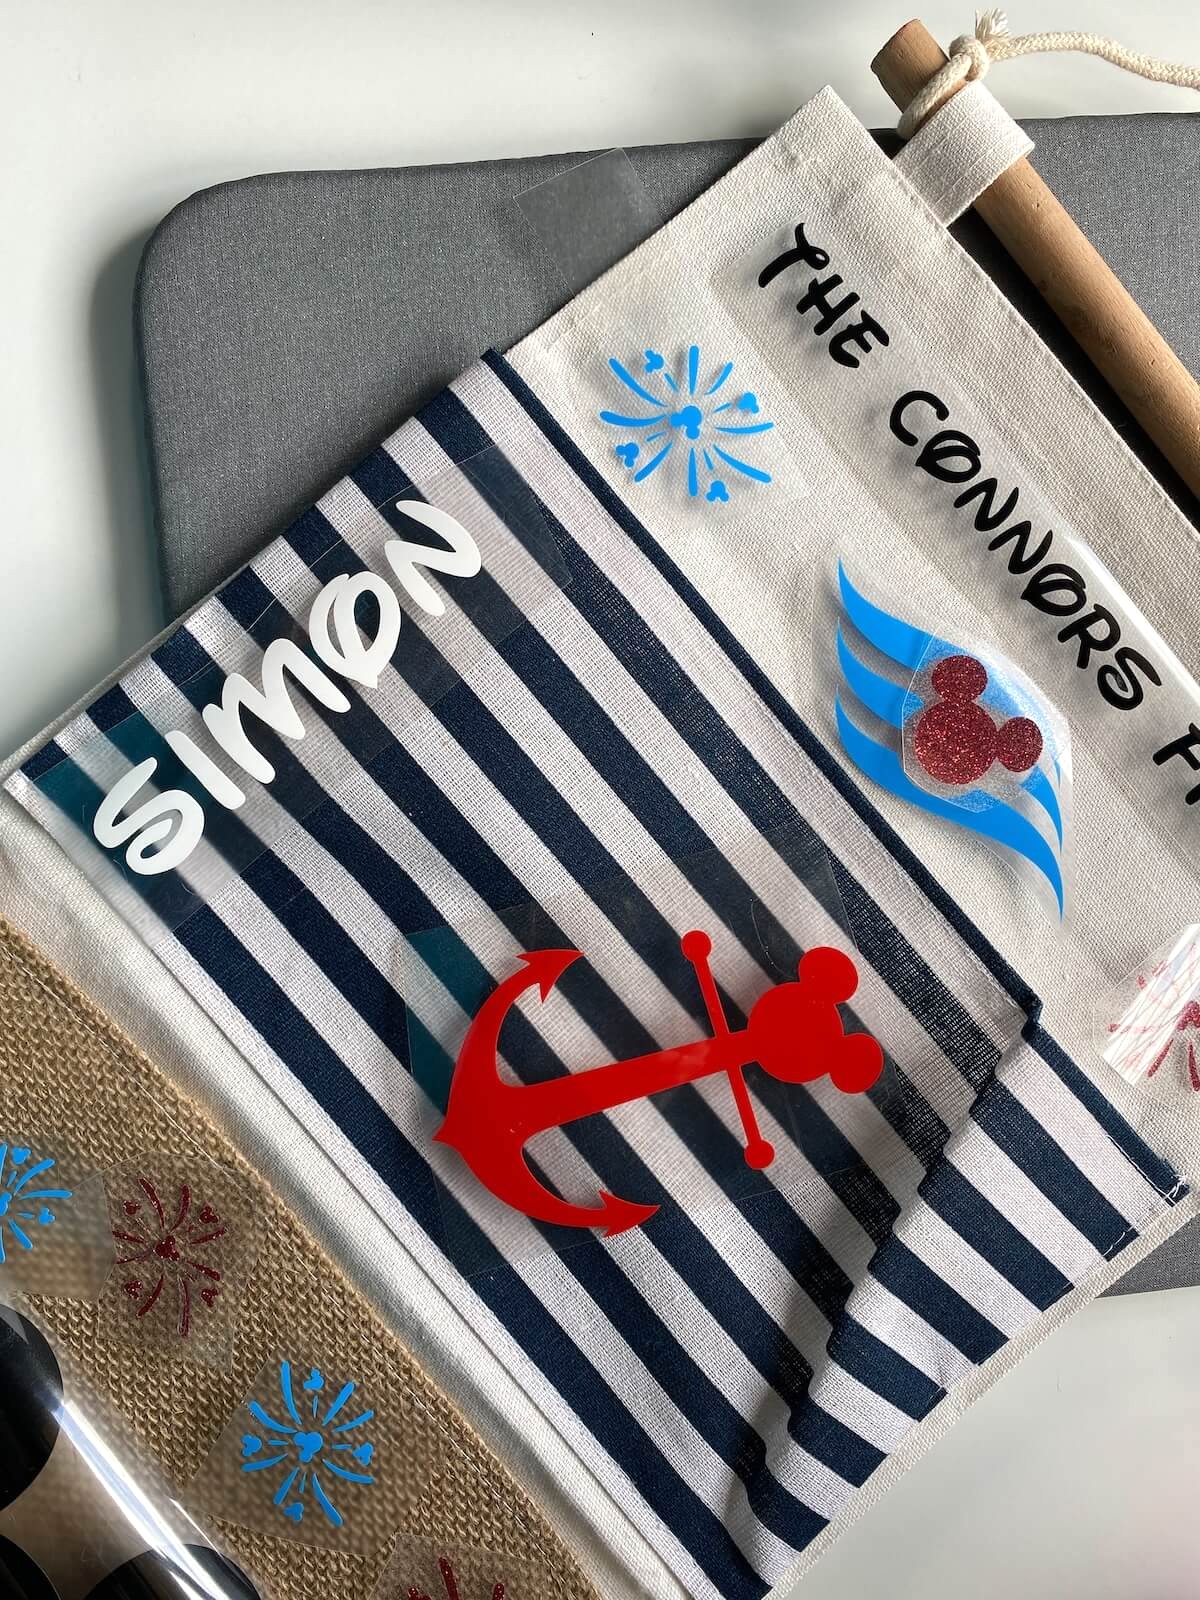
I used my Cricut Joy with heat transfer vinyl and Disney SVGs to decorate my fish extender hanger.
I used 6 colours of HTV – blue, glitter red, white, black and silver. You can use as few or as many as you like.
For designs, I used a combination of SVG files I have purchased from Etsy over the years and free files from online.
Just remember when you’re using any type of licensed SVGs, you can’t sell items you make. It’s definitely a grey area to be selling the SVGs online too so I haven’t linked to any specific files.
You can also make a Mickey head by combining 3 circles too!
For the font, I downloaded a free Waltograph font to my computer and this allows you to open it in your Cricut design space for use in your projects.
Measure your pocket areas to make sure you get the sizing right for your vinyl designs. You don’t want them too big or you will end up wasting vinyl. Once you’ve got them planned out, cut them with your Cricut or vinyl-cutting machine.
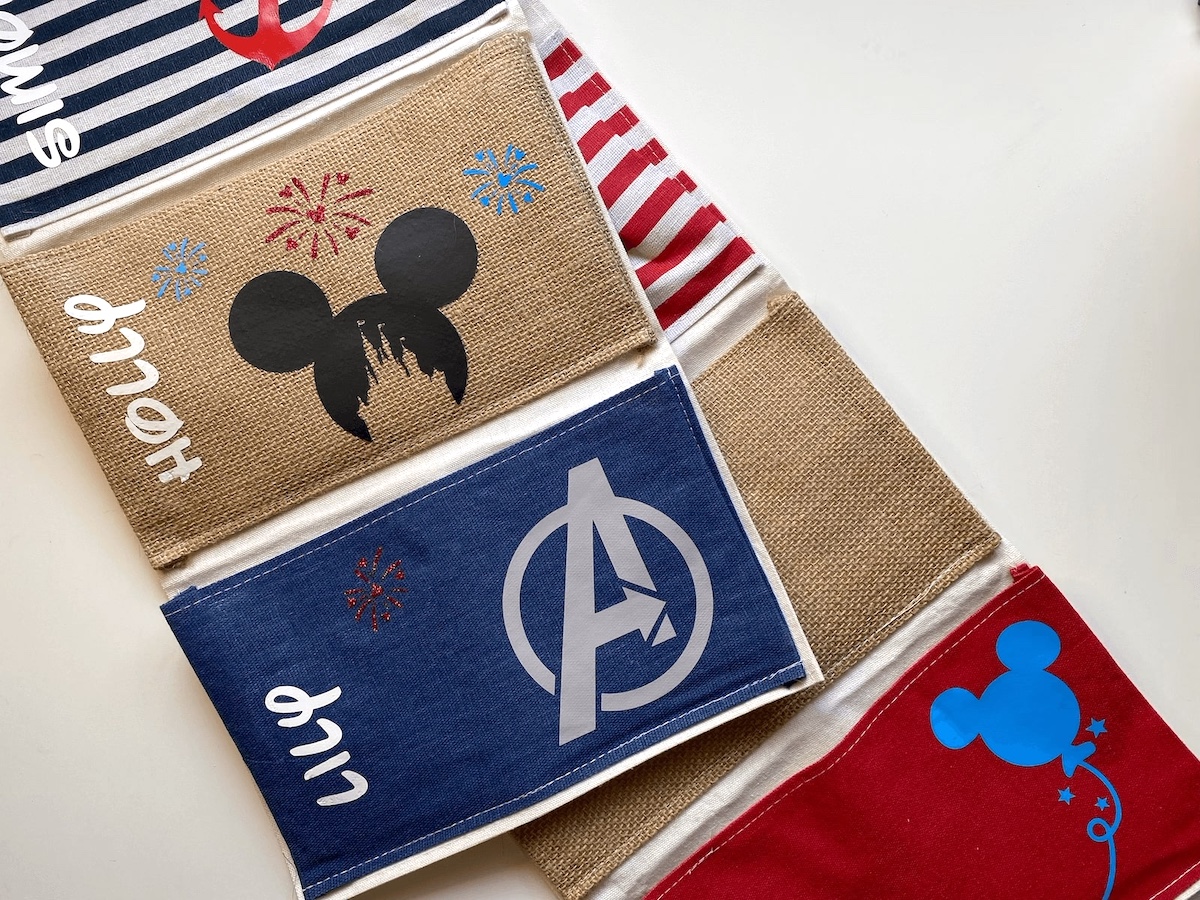
HTV TIP: When applying the heat transfer vinyl, you need to take care as the organiser pockets have a plastic liner. Before I made mine, I saw a few comments from other people who said they accidentally ironed their pockets together.
To avoid this, place a small towel inside the pocket before you apply your vinyl.
I used my Cricut Heat Press 2 to apply my HTV. I went with a lower temperature setting and shorter times. I did need to reheat a few times for certain areas, especially with the red glitter so just take your time and heat as needed. Allow to cool.
Other Ways To Decorate Your Fish Extender Door Hanger
If you don’t have a Cricut machine or another type of vinyl cutter, there are a few other options to decorate your fish extender:
- Iron-On Patches: Iron-on patches can be applied in a similar way to heat transfer vinyl and they look really cute! You can get them on Amazon, Etsy, AliExpress and other places online.
- Use Badges & Pins: Use Disney pins or badges to decorate your pockets. If you have any special ones, maybe don’t use those just in case someone takes a fancy to it – it happens. You can get unofficial Disney pins on Aliexpress and similar sites.
- Use Stickers: Stickers might not stay stuck all that long but they are a good short-term option and you can take spares with you on the cruise and stick them on if a few fall off. This is a cheap and really simple option!
Attaching The Second Organiser
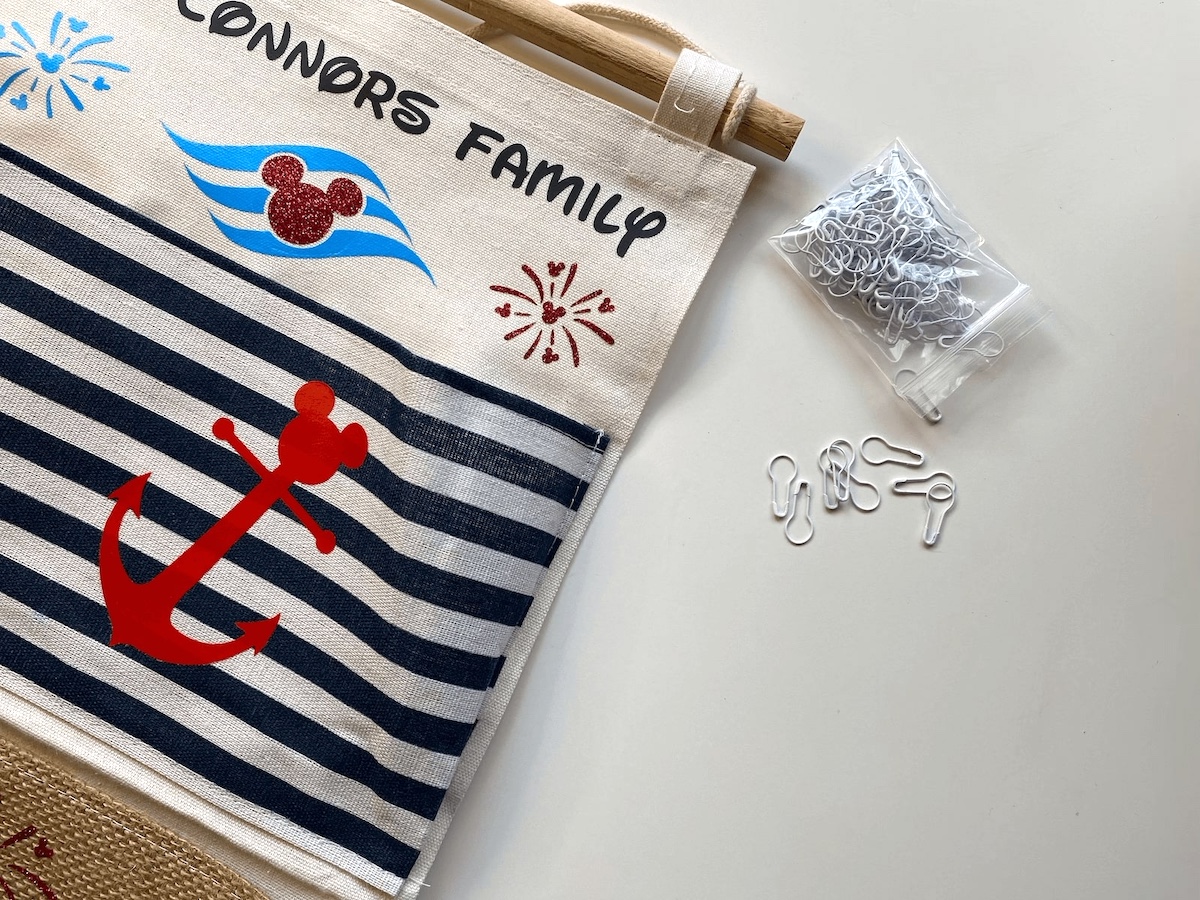
When you’ve finished decorating, you can now attach the extra organiser pockets if you need more like we did. You can do this first, however, I found it much easier to apply the vinyl before doing this step.
Remove the wooden rod and rope from the second hanger and place it behind your main hanger.
Once it is lined up, use safety pins to attach the two together.
I used the sewing style of safety pins in white, but any that you already have at home should work. And they will be pretty much invisible behind your pockets unless someone looks really closely!
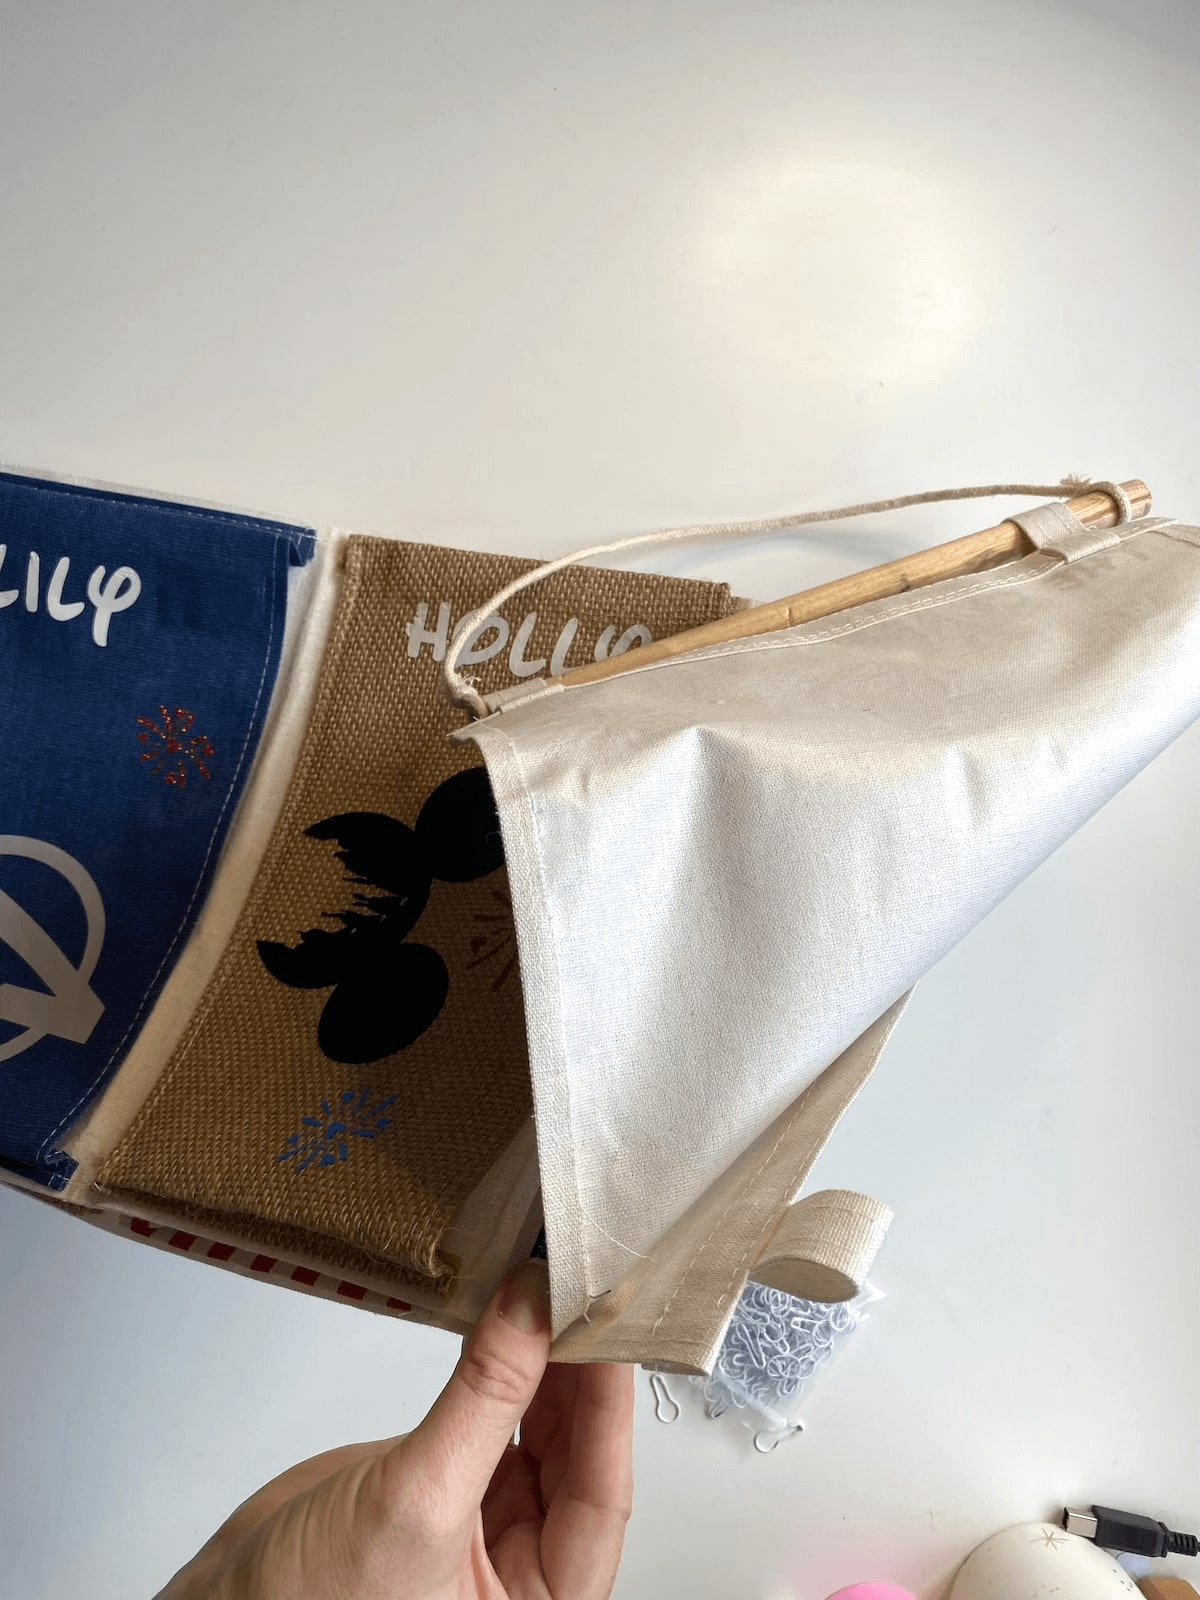
You can cut off the extra pockets if you want, however, I like the idea of being able to use the second hanger again if we ever want to… or if you ever cruised with extended family, there’s the option to expand to an extra pocket or two for future Disney Cruises too.
That’s it! Your no-sew fish extender is ready to be filled with onboard gifts and pixie dust surprises!
More Disney Crafts & Fish Extender Ideas
If you’re planning fish extender gifts or looking for more resources before your upcoming cruise, here are some more tutorials and ideas you might like:
- DIY Disney Autograph Book
- Personalised Cricut Can Koozies
- Cricut Tic Tac Toe Game Bags
- Laser Engraved Cork Coasters
Conclusion: How To Make A DIY Fish Extender
I hope you have enjoyed this simple no-sew Disney fish extender tutorial. If you do have any questions about any of the steps at all, please comment below. I am happy to help. Most of all, I hope you have a great time on your Disney cruise!
