xTool O1 Omni UV Printer Glass Tumbler Tutorial For Beginners
This post may contain affiliate links. Read the full disclosure
Glass tumblers were one of the first things I wanted to try on my xTool O1 Omni UV Printer. It was my first time using the rotary attachment and my first full-wrap print, so I made three tumblers to compare different design styles: a full wrap with full coverage, a simple design and a minimal line art design.
Two of them were personalised teacher gifts. One has bees and “thank you for being an amazing teacher” for a teacher who keeps bees as a hobby, and something sporty for the PE teacher.
In this tutorial, I’ll show you exactly how I made them, how long each one took (the varnish makes a huge difference), and the mistake that left a small gap in my full wrap design, plus how to avoid it.
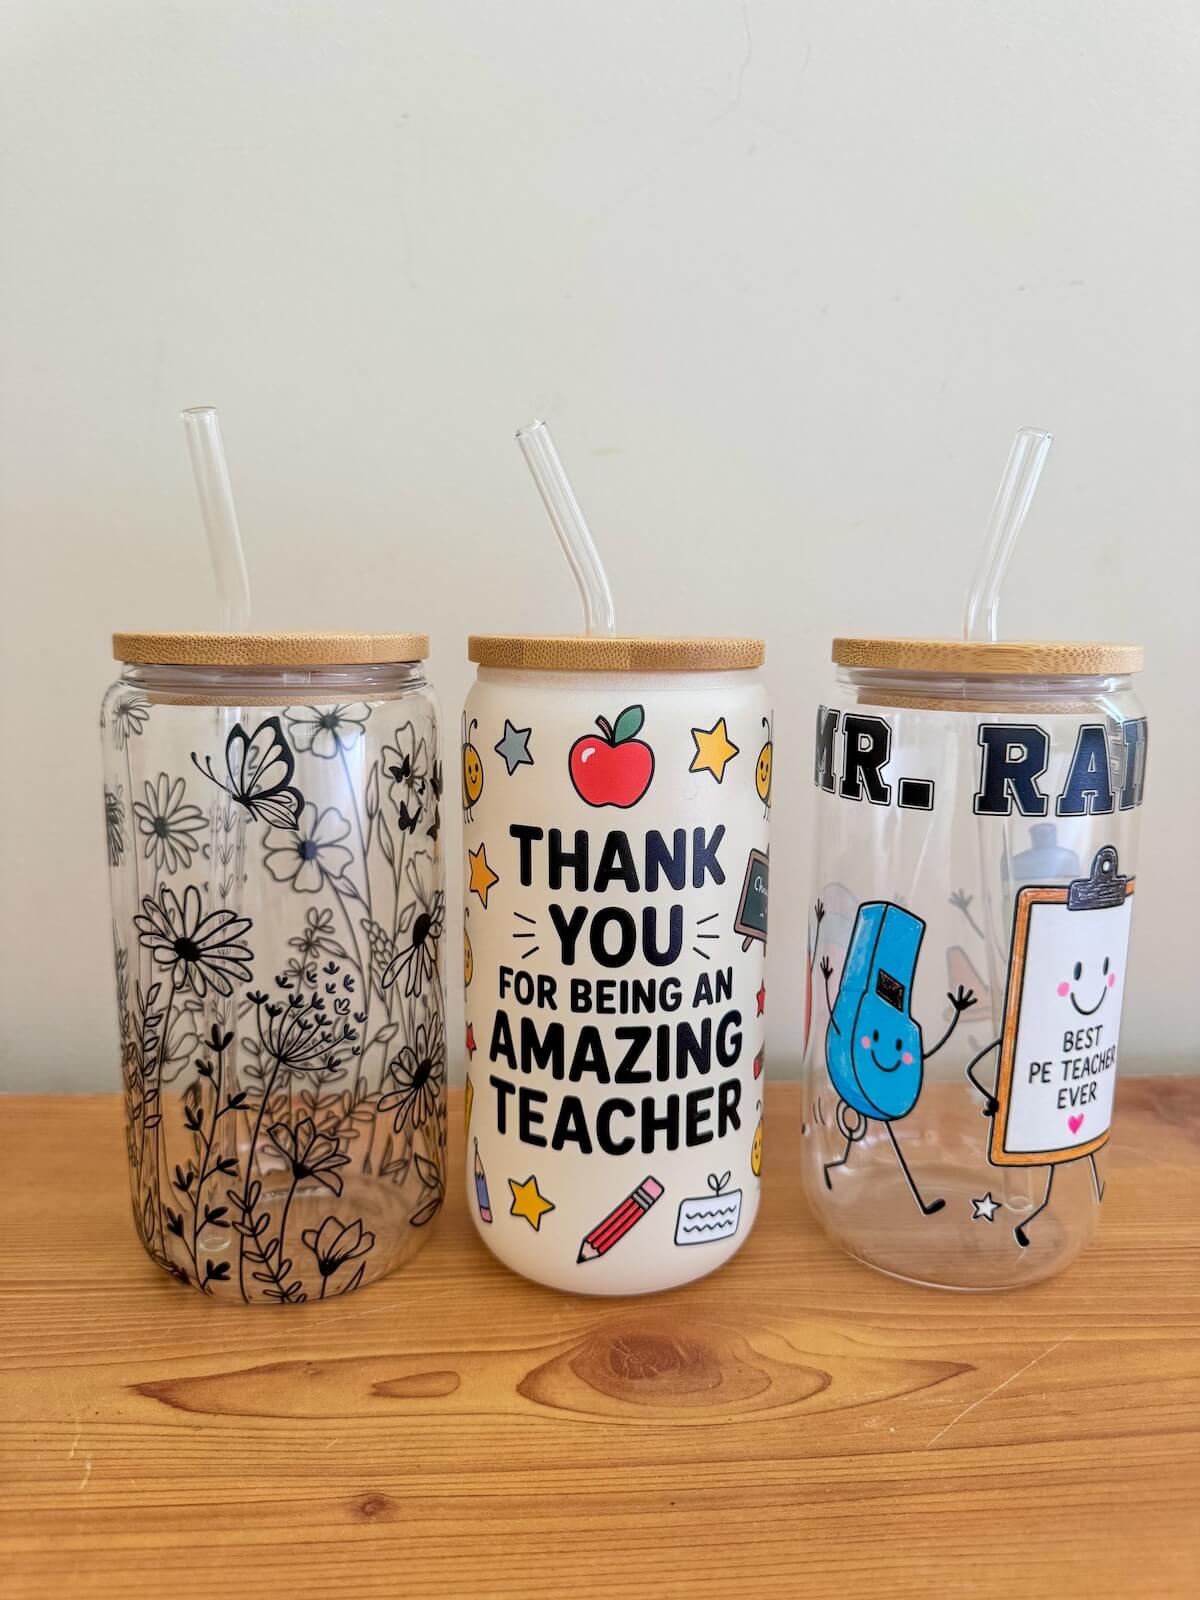
An honest heads-up before you start: after I bought these glass tumblers, I read reviews from other UV printer users saying UV prints don’t always last well on smooth glass and some metals. Frosted glass or powder-coated tumblers may hold up better. I made this one as a trial, and I’ll update this post once I’ve seen how it holds up with use.
Project at a glance
- Print time: Around an hour if adding a layer of varnish
- Rotary setup: About 15 minutes (first time only)
- Difficulty: Beginner to intermediate
- Machine: xTool O1 Omni UV Printer (Dual-Head UV Edition) with the rotary attachment
What You Need
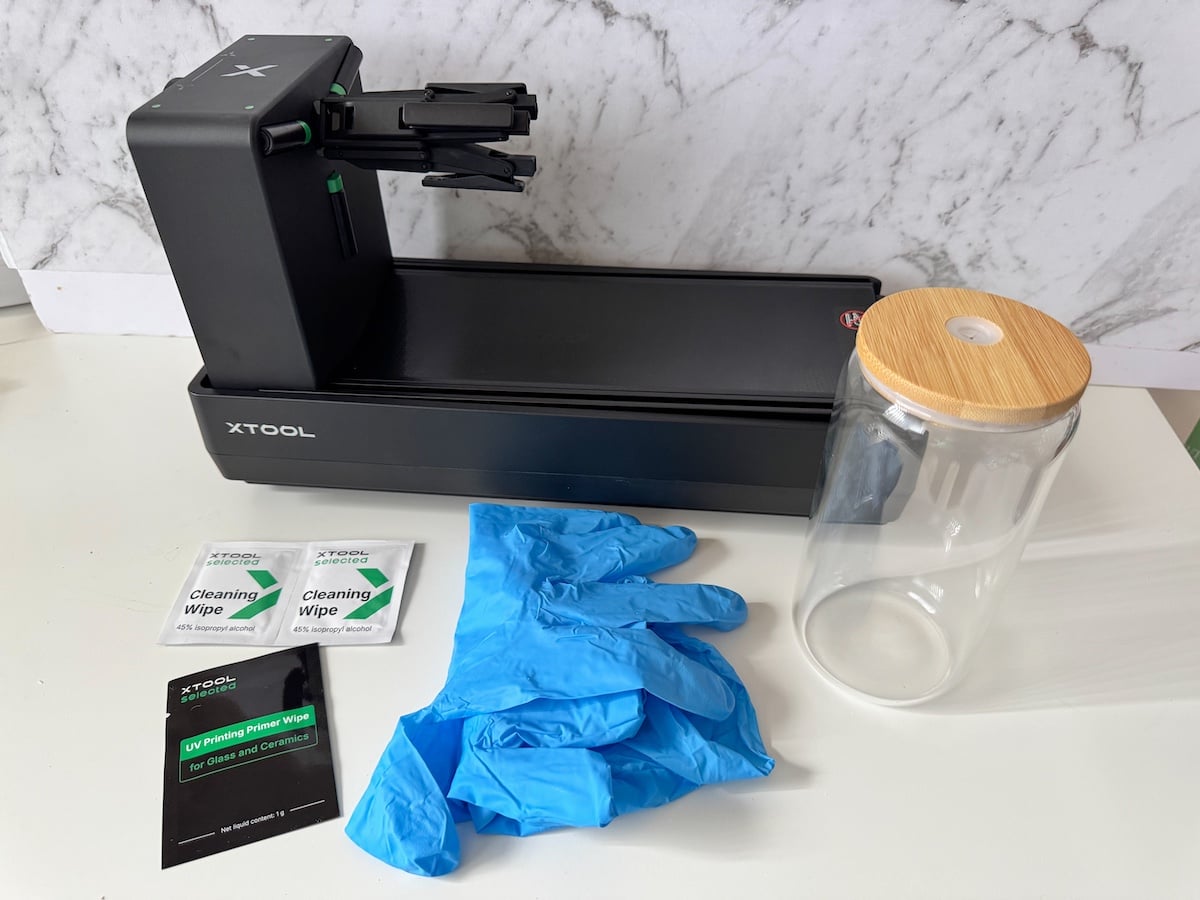
- xTool O1 Omni UV Printer: I used the Dual-Head UV Edition
- xTool rotary attachment: Use the rotary for printing all the way around cylinders
- Glass tumbler: I used a 16oz glass cylinder tumbler with a bamboo lid and straw. Read my heads-up above before you buy these.
- Alcohol wipes: to clean the glass
- xTool glass primer wipes: so the ink sticks to the glass
- Design: I used a mix of tumbler wraps and designs from Creative Fabrica and Canva with edits in xTool Studio
Beginner’s tip: Smooth surfaces like glass, acrylic and metal need a primer so the ink has something to grip onto.
Setting Up The Rotary
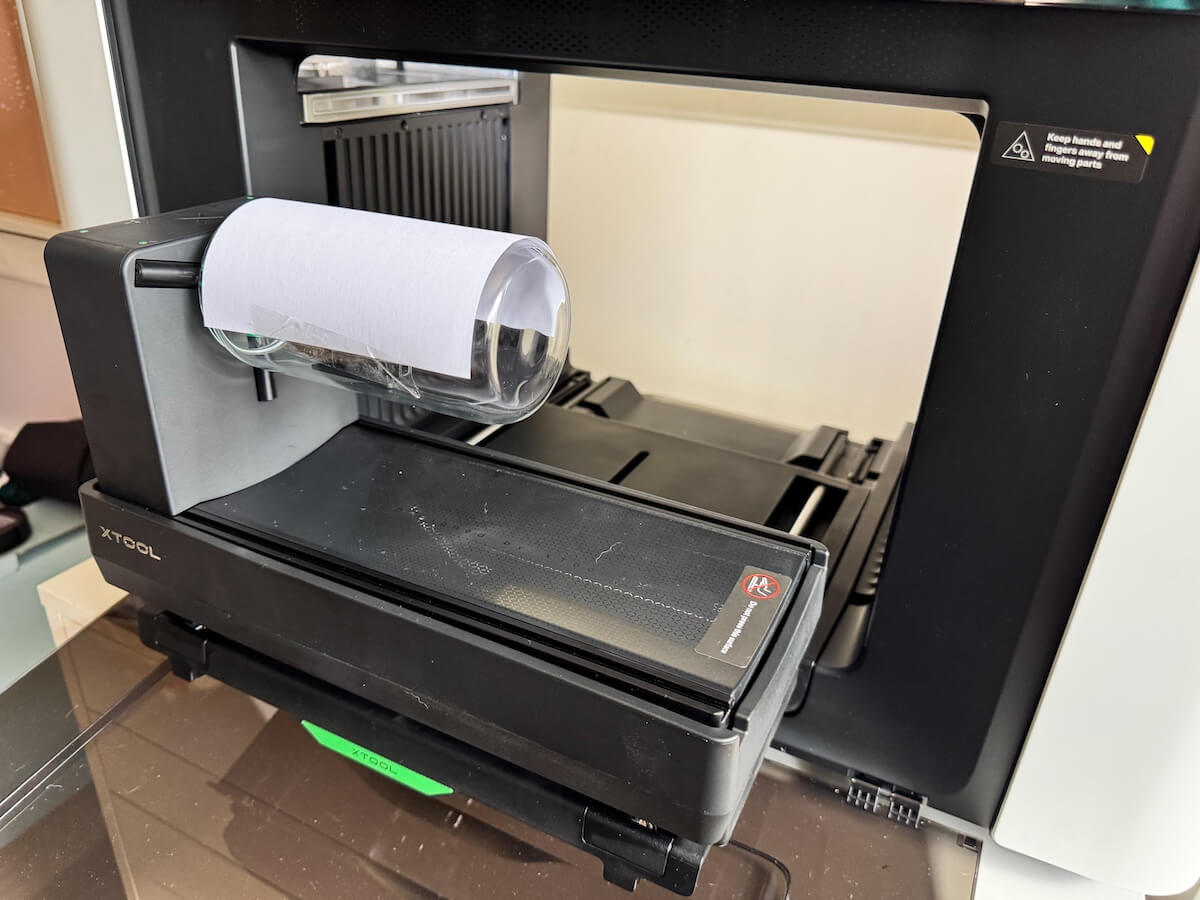
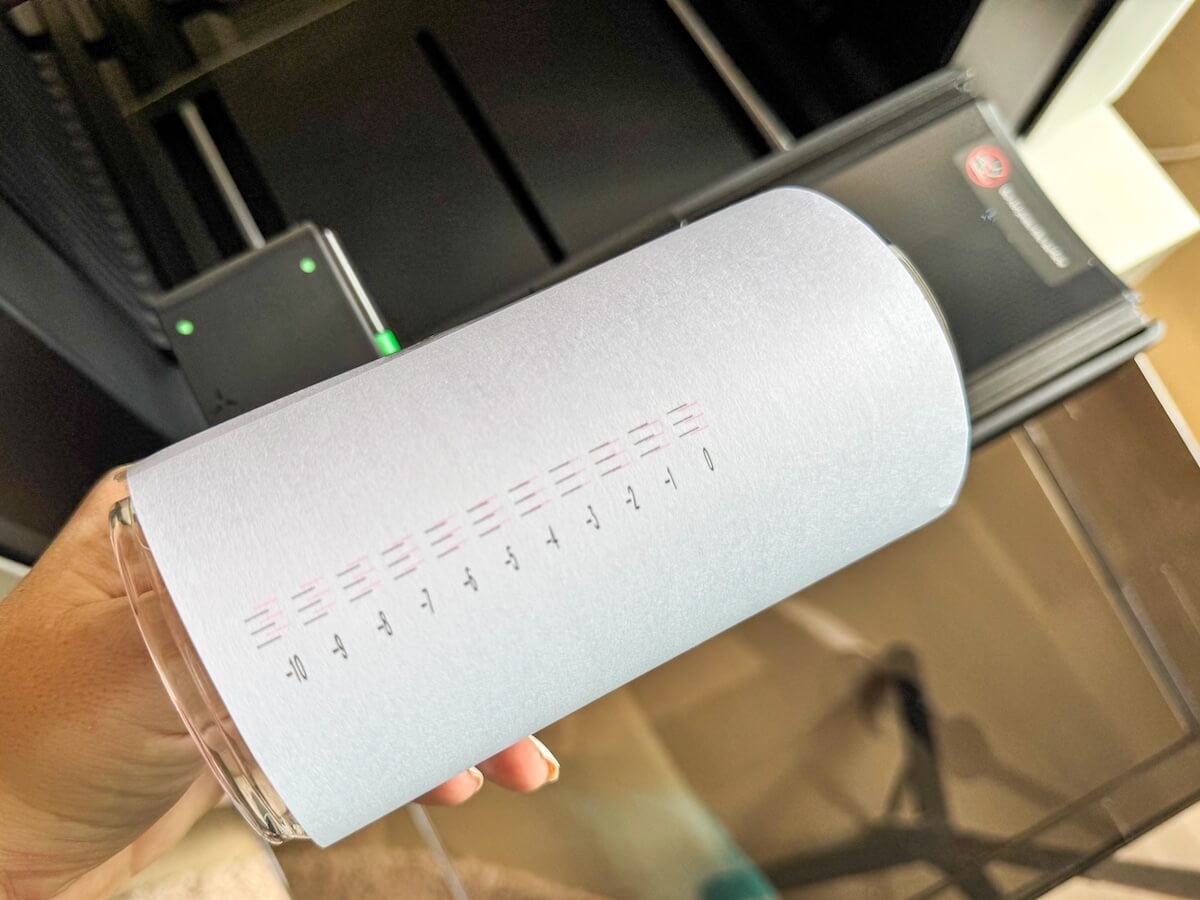
The rotary setup was quite easy. Like the rest of the O1, there are guided video tutorials and a guided calibration, and the whole thing took me about 15 minutes.
How it works:
- Clip it in. The rotary clips into the printer in place of the small baseplate.
- Run the calibration. Because I have the Dual-Head edition, the calibration has you stick a piece of paper around a tumbler and print on it. The printer uses that test print to work out the right calibration numbers.
- Load your tumbler. Remove the lid (the tumbler needs to clip into the rotary arms), then clip it in.
The rotary also has a tail module for heavier items, but I didn’t need it for a light glass tumbler. Judge this based on how secure your item feels within the rotary arms. If there’s still some movement, or it’s an unusual shape, use the tail.
You only need to do the full calibration the first time, so future tumblers are much quicker to set up.
How To Make A Full Wrap Teacher Gift Tumbler
Step 1: Prep The Glass
Wipe the outside of the tumbler with an alcohol wipe to remove fingerprints and dust, then go over it with an xTool glass primer wipe and give it time to do activate. The time it takes to set up your design is usually enough time.
Step 2: Load The Tumbler Into The Rotary
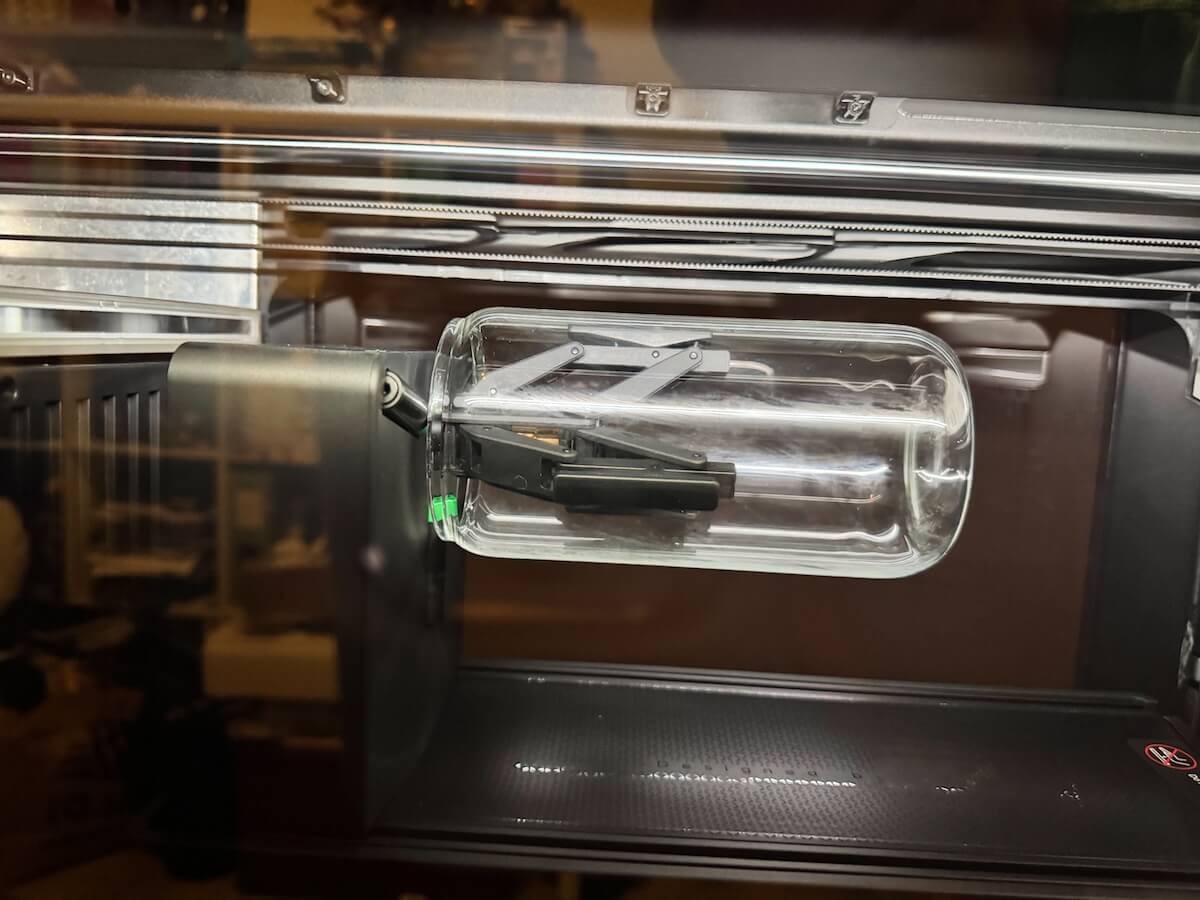
Take the lid and straw off, then clip the tumbler into the rotary arms and twist until firm.
Step 3: Set Up Your Design
I used a bee tumbler wrap from Creative Fabrica, but it wasn’t the right size for my 16oz tumbler. To make it fit, I had to make some tweaks:
- Added extra shapes to fill in the background
- Cropped pieces of the design to fill the gaps
- Added the teacher’s name with a font in xTool Studio
For the PE teacher design, I used a design from Creative Fabrica, paired with an uploaded font also from the site to personalise it, and the final design was a line art graphic from Canva Pro with a couple of extra elements added and exported as a PNG with a transparent background into xTool Studio.
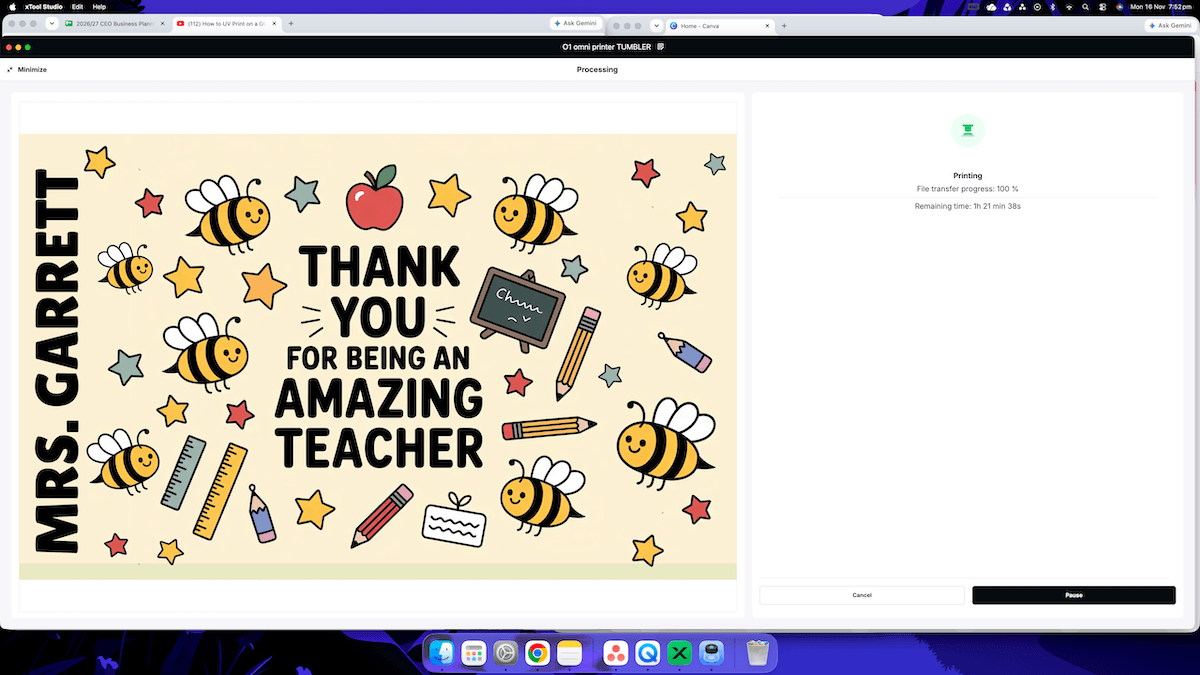
Watch out: at one point xTool Studio told me my design was outside the print area, so I adjusted it to fit. I think that’s how my gap happened. More on that below.
Step 4: Choose Your Layers
I printed 1 layer each of white, colour and varnish, with a 0.2mm choke, on standard quality.
Step 5: Print
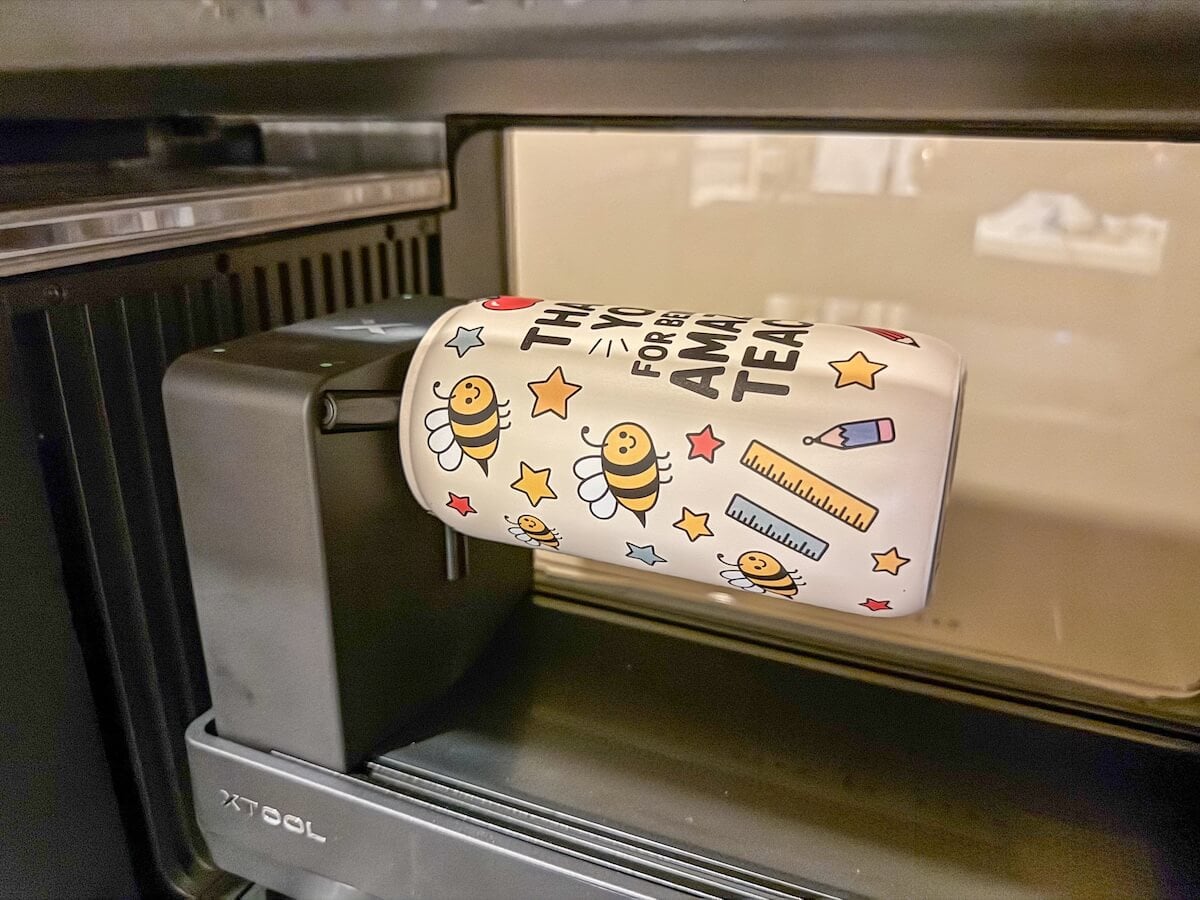
With varnish, the whole print took 1 hour 25 minutes, so this isn’t a quick project. Without varnish, the same design took 29 minutes (more on that below). The doors need to stay shut while it prints, so it’s hard to get progress photos.
Step 6: Finish And Gift
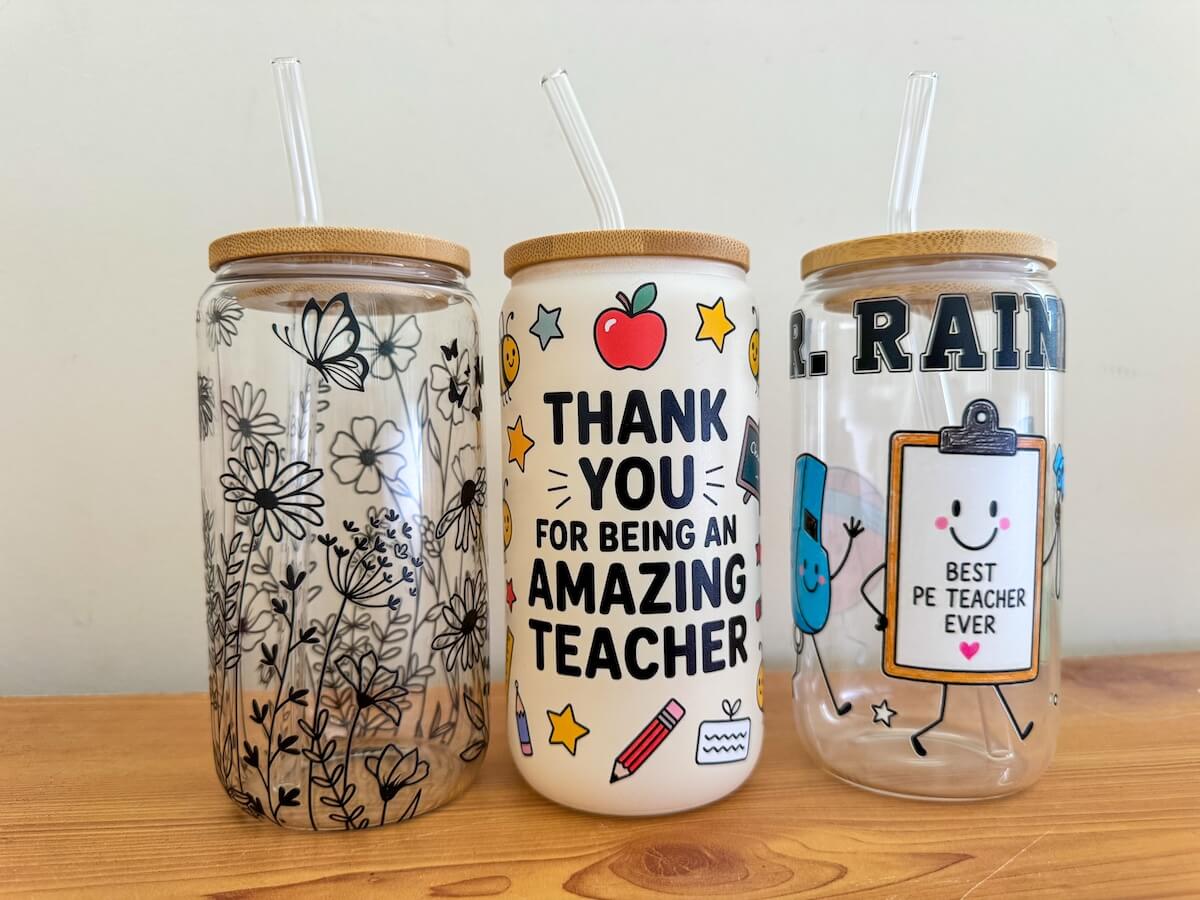
xTool recommends letting the piece rest at room temperature for at least 30 minutes after printing, without scratching or washing it, so the ink can fully bond.
You also need to give it a wipe-down after that time with an alcohol wipe or soapy water to get rid of the sticky texture. Your xTool Studio will advise of this after printing is complete.
Then pop the lid and straw back on, and it’s ready to gift.
My Settings At A Glance
| Setting | What I used |
|---|---|
| Machine | xTool O1 Omni (Dual-Head UV Edition) |
| Attachment | Rotary (no tail module) |
| Tumbler | 16oz glass cylinder, lid removed |
| Prep | Alcohol wipe, then xTool glass primer wipe |
| Ink layers | 1x white + 1x colour + 1x varnish |
| Choke | 0.2mm |
| Quality | Standard |
| Print time | 1 hour 25 minutes |
Three Tumblers, Three Styles: How Long Each Took
After the bee tumbler, I made two more to compare different design styles.
I expected the minimal line art design to be much quicker, but even on the fast setting it still took an hour. So I sent the same design to processing in xTool Studio minus the varnish layer, and the total time dropped to 15 minutes.
| Design | Layers | Quality | Print time |
|---|---|---|---|
| Full wrap, full coverage (the bee tumbler) | White + colour + varnish | Standard | 1 hour 25 minutes |
| Full wrap, full coverage (the bee tumbler) | White + colour, no varnish | Standard | 29 minutes |
| Simple PE Teacher design | White + colour + varnish | Standard | About 1 hour 15 minutes |
| Minimal line art | Colour + varnish | Fast | 1 hour 1 minute |
| Minimal line art | Colour only, no varnish | Fast | 15 minutes |
So for me, the varnish was what made these tumblers so slow, not the design or the quality setting.
Leaving it off cut the full wrap from 1 hour 25 minutes to 29 minutes, and the minimal design from just over an hour to 15 minutes. Switching from standard to fast didn’t make much difference on its own.
I’m not sure exactly why the varnish adds so much time. My guess is that it prints in multiple coats or takes longer to cure than the colour layers, but I haven’t been able to confirm that.
Either way, it’s the single biggest factor in how long a tumbler takes.
The catch is that the varnish isn’t just for looks. According to xTool’s own UV printing guide, adding a clear varnish coat after the colour layers is the most effective way to improve scratch resistance. So leaving it off saves a lot of time, but it may make the print easier to scratch.
In saying that, some O1 users online have reported that the varnish can still be scratched with a fingernail, so it’s not a heavy-duty coating either. I’m testing tumblers with and without varnish and will update this post with how they hold up.
Tip: If time matters, skipping the varnish on simple designs saves a lot of printing time. Just know you’re trading off some scratch resistance, so I’d keep it on anything that will be handled or washed a lot.
The Gap: What Went Wrong And How To Avoid It
The tumbler came out looking great, except for one thing: a tiny gap in the design where the wrap should have joined up. I didn’t notice it when I checked the preview before printing.
I’m fairly sure it happened when xTool Studio told me my design was outside the print area. When I shrank it to fit, the wrap no longer stretched all the way around the tumbler. I probably didn’t check as closely as I should have on the final preview.
How to avoid a gap on a full wrap print:
- Let the background run past the seam. Extend the background a few millimetres past where the ends meet, so there’s no chance of a bare strip.
- Resize carefully. If you get the “outside print area” warning, trim or move the part that’s sticking out rather than scaling the whole design down, then re-check the join.
- Check the preview from every angle. Rotate the 3D preview all the way around and zoom in on the join before you hit print. It’s easy to miss a gap if you only look at the front.
What I Learned From This Project
Durability
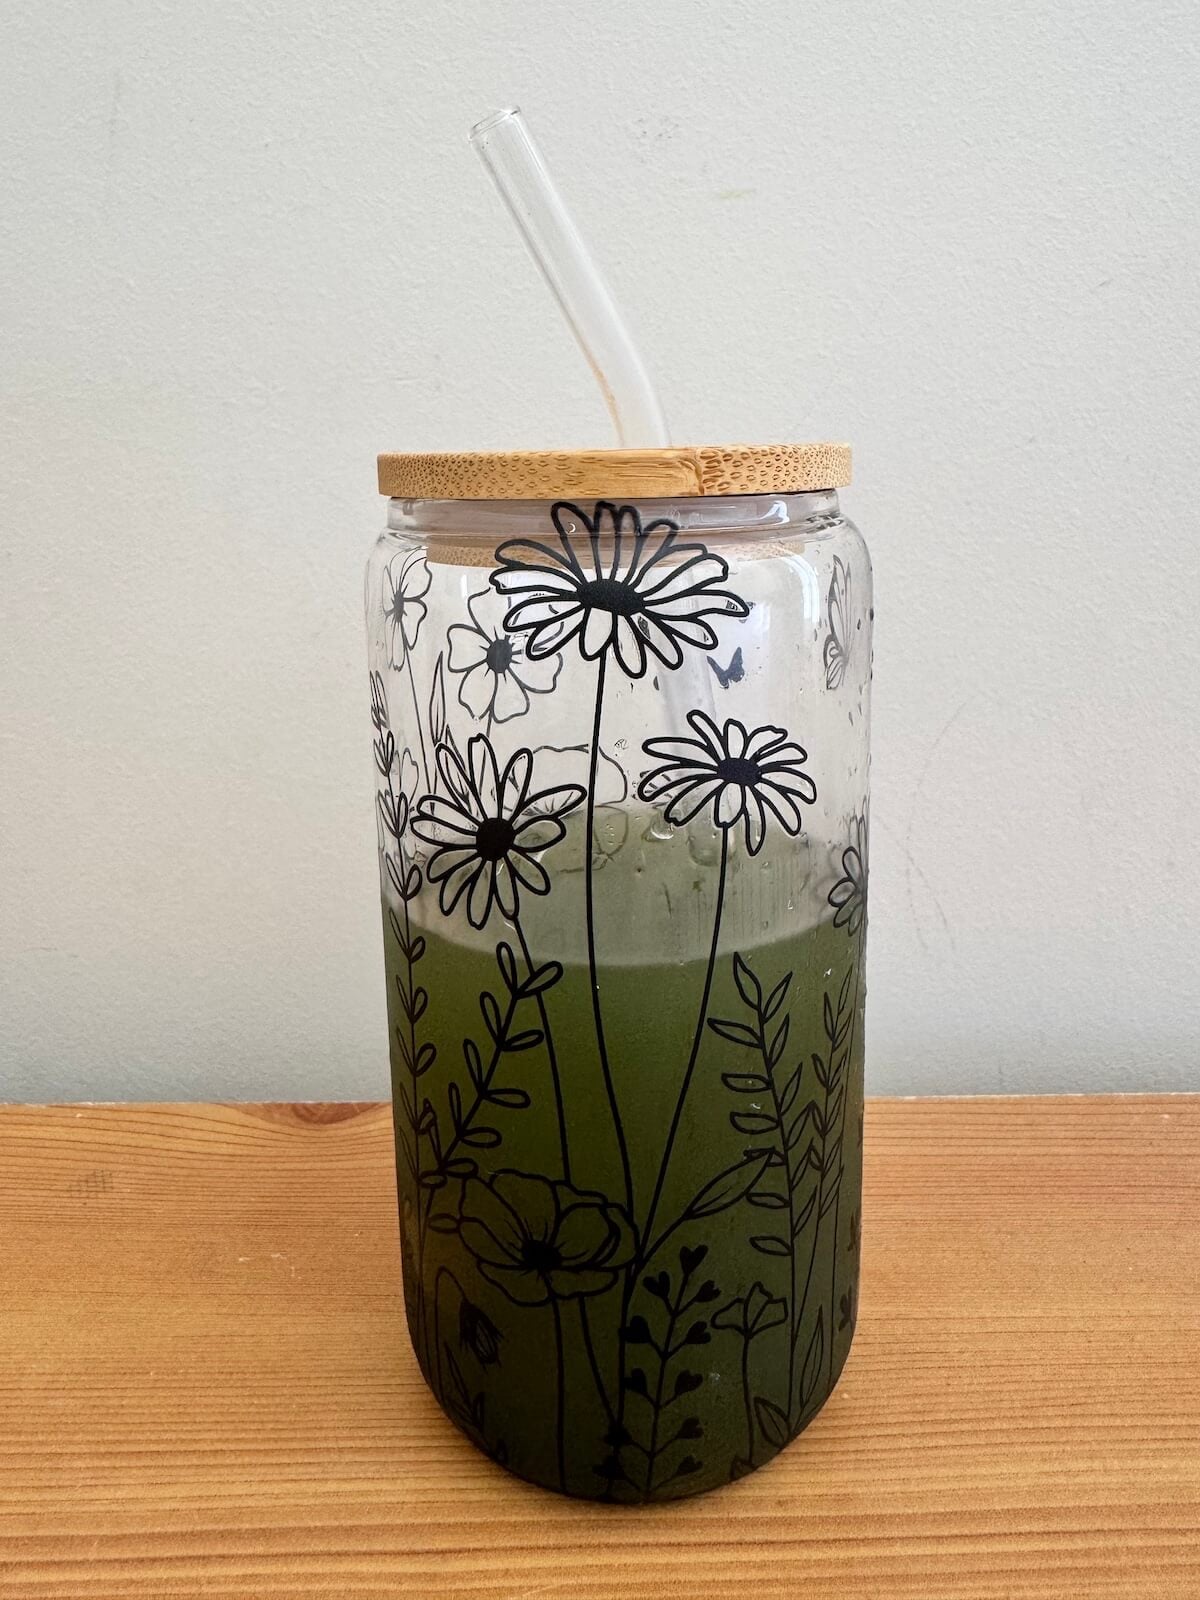
I’m not sure yet how well the print will hold up on smooth glass. Since buying these tumblers, I’ve read that UV prints can wear on glass and some metals, and that frosted glass or powder-coated tumblers may be better options.
xTool’s own guide also says UV prints can’t handle the dishwasher, so hand washing is a must.
I’m going to print a few more and test them with regular use and washing, and I’ll update this post with how they go. These particular tumblers may end up being better for laser engraving on my xTool M1, and I’ll try some different surfaces for UV printing.
Noise And Smell
The smell isn’t overly strong, but sitting in the room with the printer for almost an hour and a half, I did end up with a bit of a headache from the noise and smell combined. Opening a window helped with the smell.
It’s also much louder in the quiet of night than during the day. If you’re printing long jobs like this, keep the room well ventilated and take breaks away from it. Earplugs or noise-cancelling headphones might be good too
Make It Your Own
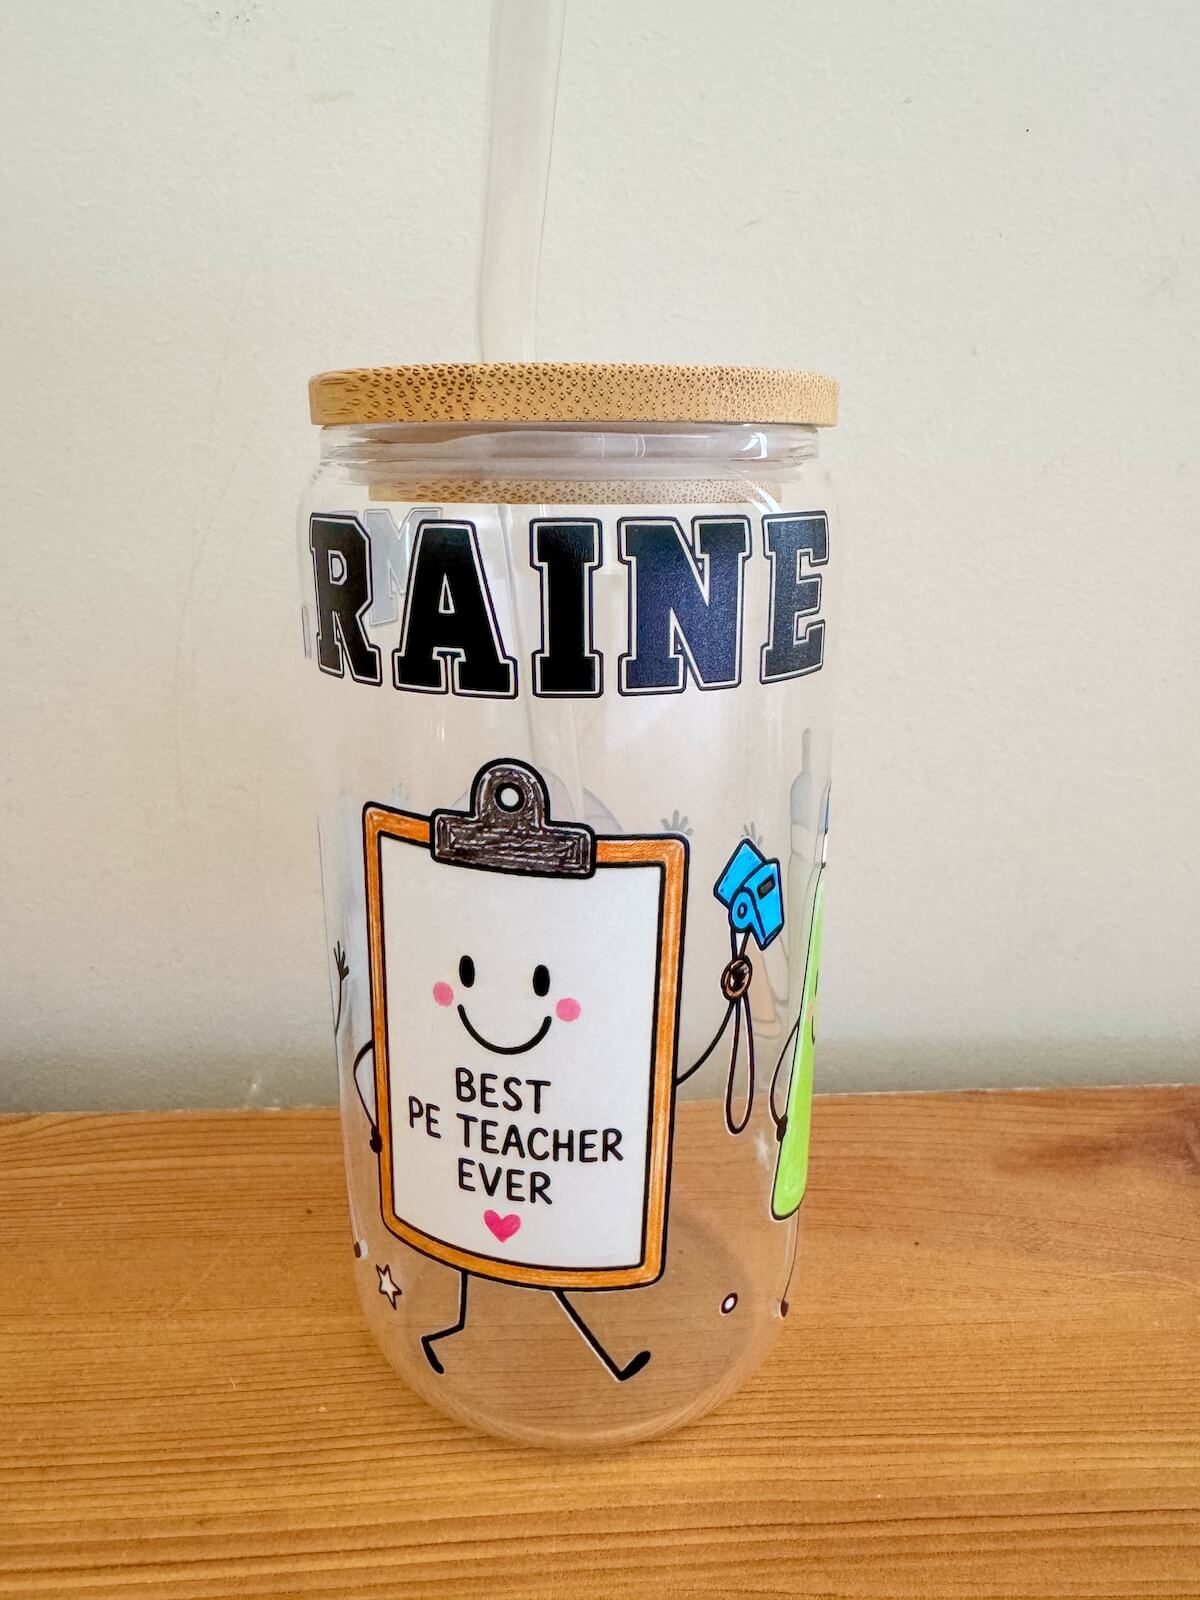
The bee design was perfect for a teacher who keeps bees, and matching the design to a teacher’s hobby makes the gift feel extra thoughtful. And a PE teacher-specific one too. A few other ideas:
- Gardening: flowers and “thank you for helping me grow”
- Sport: their team colours or sport
- Reading: books and a favourite quote
- Coffee lovers: coffee beans and cups
Overall, these O1 Omni UV Printer glass tumblers are so cute, and I love how they look.
I hope the print stays in place for a long time because they make perfect gifts, especially as a simple teacher gift or friend gift. They would also make fabulous party favours such as for a slumber party for teens.
FAQs
Can You UV Print On Glass Tumblers?
Yes. I printed a full wrap design on a glass tumbler with the xTool O1 Omni and the rotary attachment. I prepped the glass with an alcohol wipe and then a glass primer wipe. I’m still testing how well the print lasts with use and washing.
Do You Need Primer To UV Print On Glass?
I used xTool’s glass primer wipes after cleaning the glass with an alcohol wipe, so the ink had something to stick to.
How Long Does It Take To UV Print A Tumbler?
It depends a lot on the varnish. My full wrap design took 1 hour 25 minutes with varnish and 29 minutes without. A minimal line art design took just over an hour with varnish and 15 minutes without. Setting up the rotary for the first time took about 15 minutes on top of that.
Why Is There A Gap In My Tumbler Wrap?
Usually the design isn’t quite wide enough to go all the way around the tumbler. Check the design is at least as wide as the tumbler’s circumference, and check the join in the 3D preview before printing.
Is A UV Printed Tumbler Dishwasher Safe?
No. xTool’s UV printing guide says UV ink can’t withstand dishwasher cycles, hard scraping with keys or blades, or sanding. Hand wash gently, and include a care note if you’re gifting one.